[ACS] Maze
This challenge provided a binary called maze compiled with Rust. Executing it tells us that we are dealing with a maze challenge.
There are 3 methods IMO to solve this:
- Coding
- Fully dynamic analysis
- Partial dynamic + static analysis
One thing to note is this maze is different with what we can find online, where it used 3 cells instead of 1 cell:

Therefore online maze solver script like the following won’t help much:
https://gist.github.com/a613/49d65dc30e98c165d567
Of course we can try to modify it to suit our case, but i failed to do so during the competition, all i managed to do is to make it generate the path till end but its still used 1 cell per step instead of 3 which means it will generate some unnecessary steps. Besides that, the solve script only tells us the correct path visually without revealing the correct direction taken like LEFT, RIGHT, UP, DOWN. I attempted to modify it but no avail, as the script is using 1 cell per step which will cause misalignment when translate the correct direction to word.
Challenge Analysis
After trying out the maze binary several times, we will realized that it need some kind of automation instead of manual solving as there is so much levels to complete. Therefore, we can safely assumed that after certain level we will be given the flag.
Solution(s)
Method 1 (Coding)
This solution requiring coding to code out the DFS algorithm to generate the correct path, besides that, it need to use PyAutoGUI or manual copy the maze from the terminal into a file before running the solver. After getting the correct direction, it uses PyAutoGUI to press the correct key. You might be wondering, why don’t we just utilize the pwntools to obtain the maze completely? I did tried that but for some weird reasons, pwntools only able to capture half of the maze (not entirely sure why). As i’m not expert in this, ill just leave the brief solution here for this method.
Method 2 (Fully Dynamic Analysis)
Our goal of using fully dynamic analysis is to get to the instruction where it perform the step moving so that we can change the coordinate and teleport to the END. One trick is to utilize the GDB remote debugging instead of simply gdb ./maze as doing it will have debugging UI on top of the maze, which ruined the UI cuz we need the UI to know exactly when the START symbol start moving.
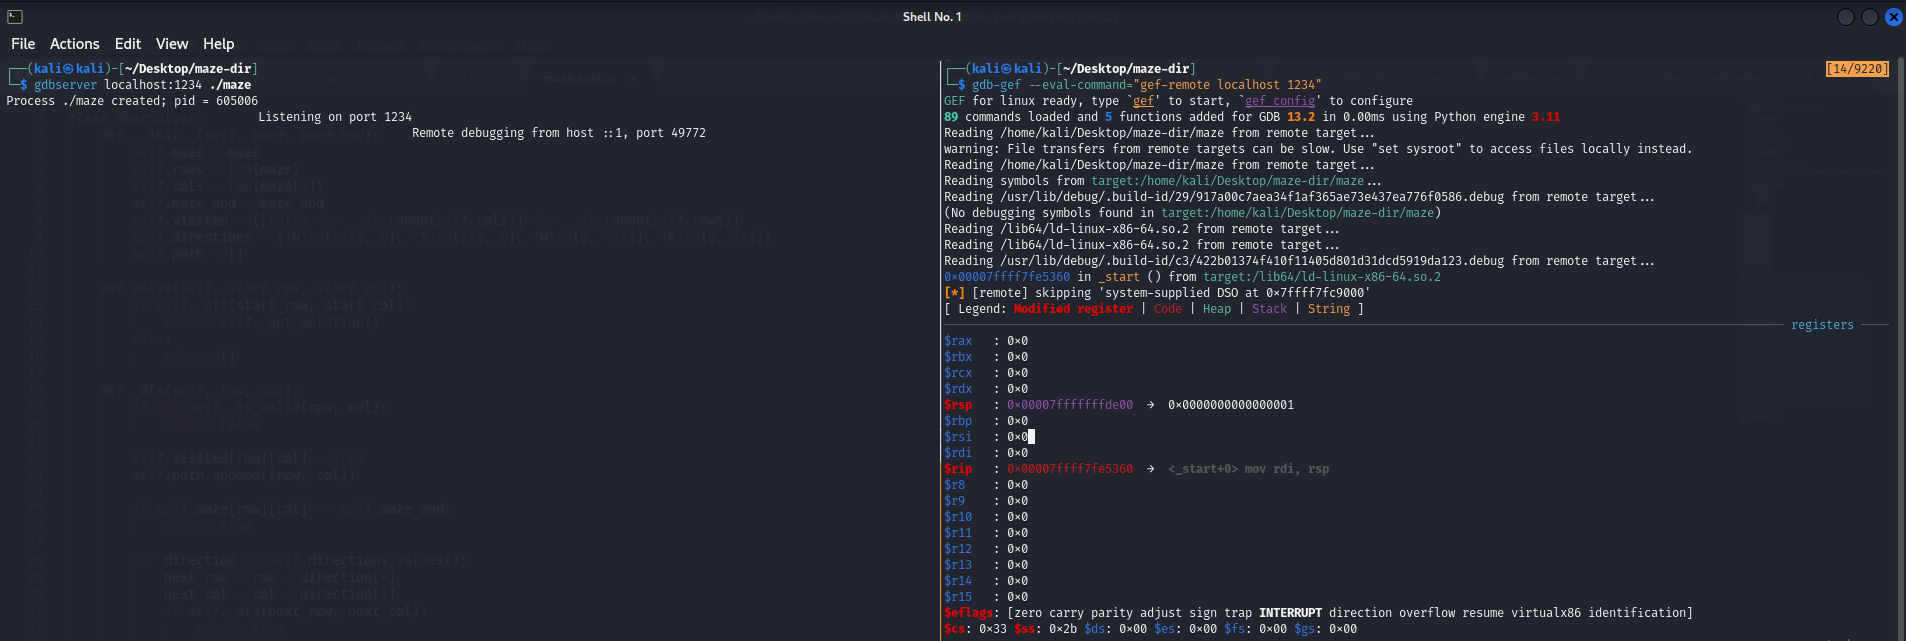
We can open 2 pane execute the following commands:
Pane 1:
gdbserver localhost:1234 ./maze
Pane 2:
gdb-gef --eval-command="gef-remote localhost 1234"
Note: I’m using GEF which has little differences compare to original GDB
Next we can ctrl + c in our GDB and at our maze we move one step to anywhere we like, we won’t be able to immediately see it moving as now GDB is intercepting our input. So now we can keep ni till the instruction that performs the symbols moving.
We eventually will reach this call which is responsible to move the symbols:
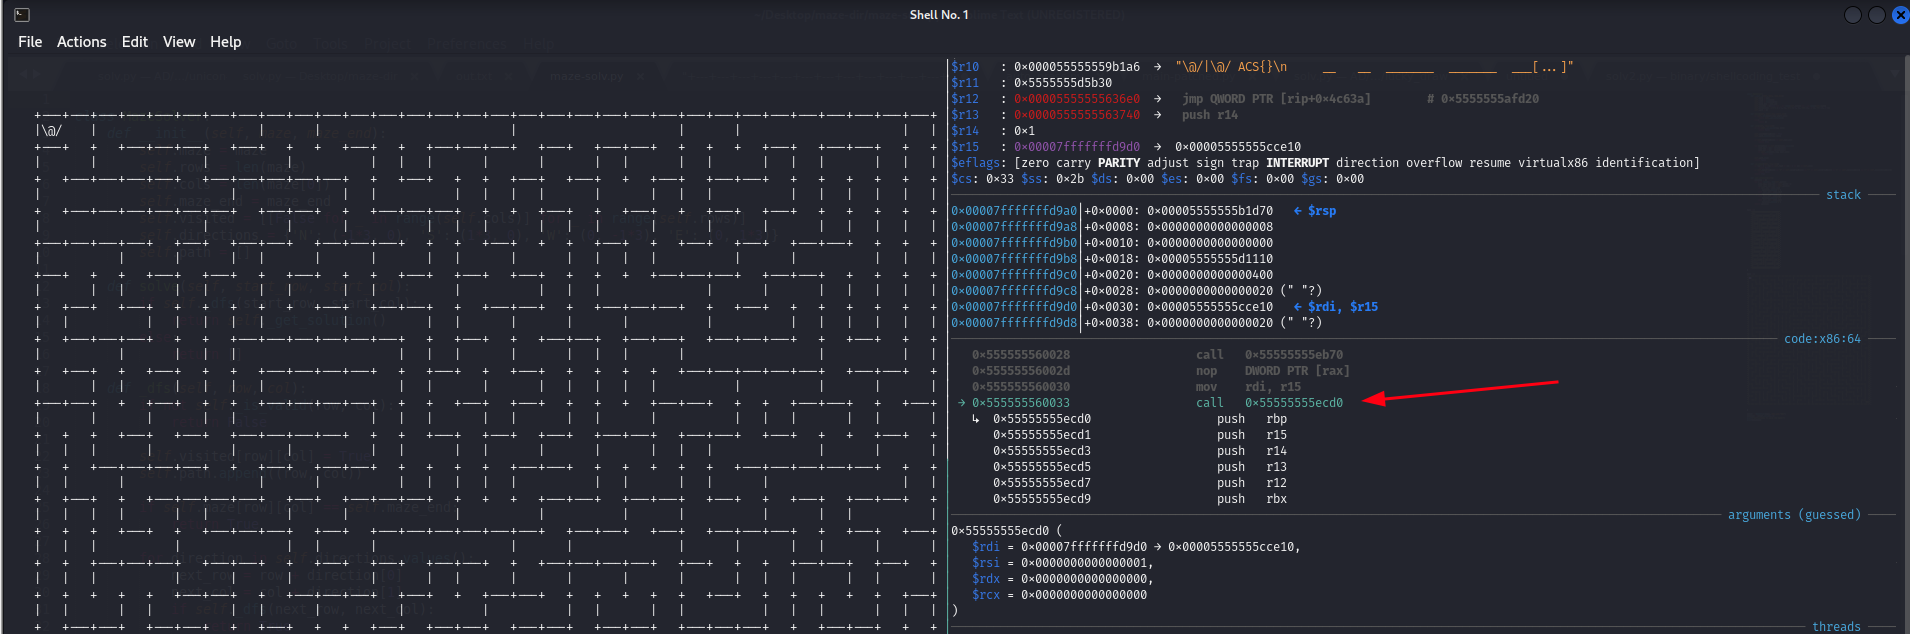
But what’s next? Looks like r14 will contains the coordinate x (rows) and rbx will contains coordinate y (columns):
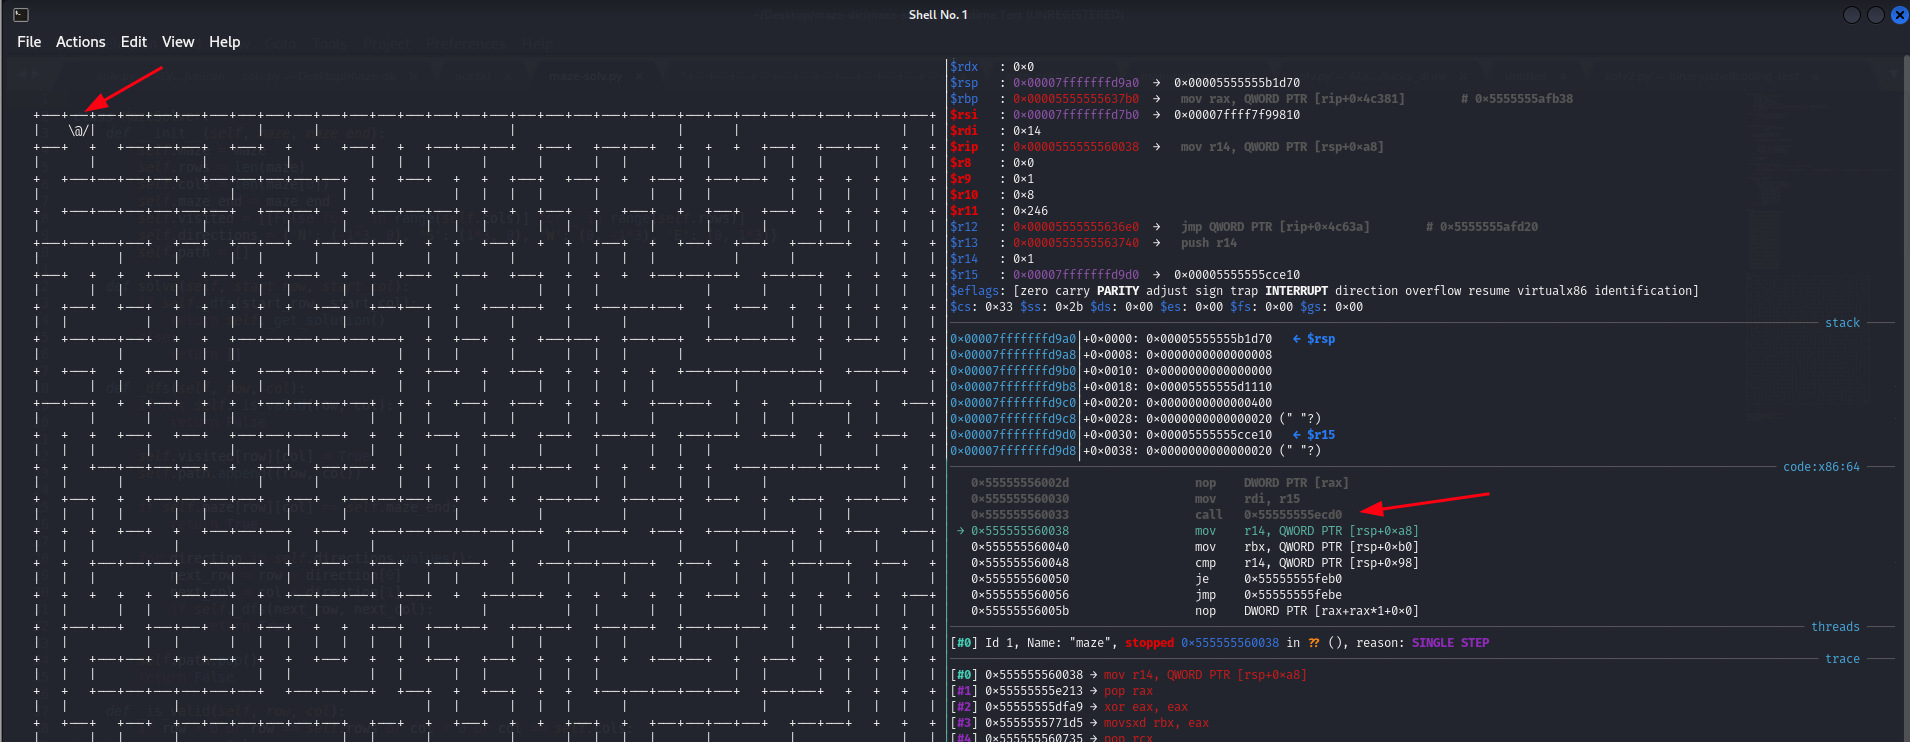
We can verify our assumption but running the program again with different maze:

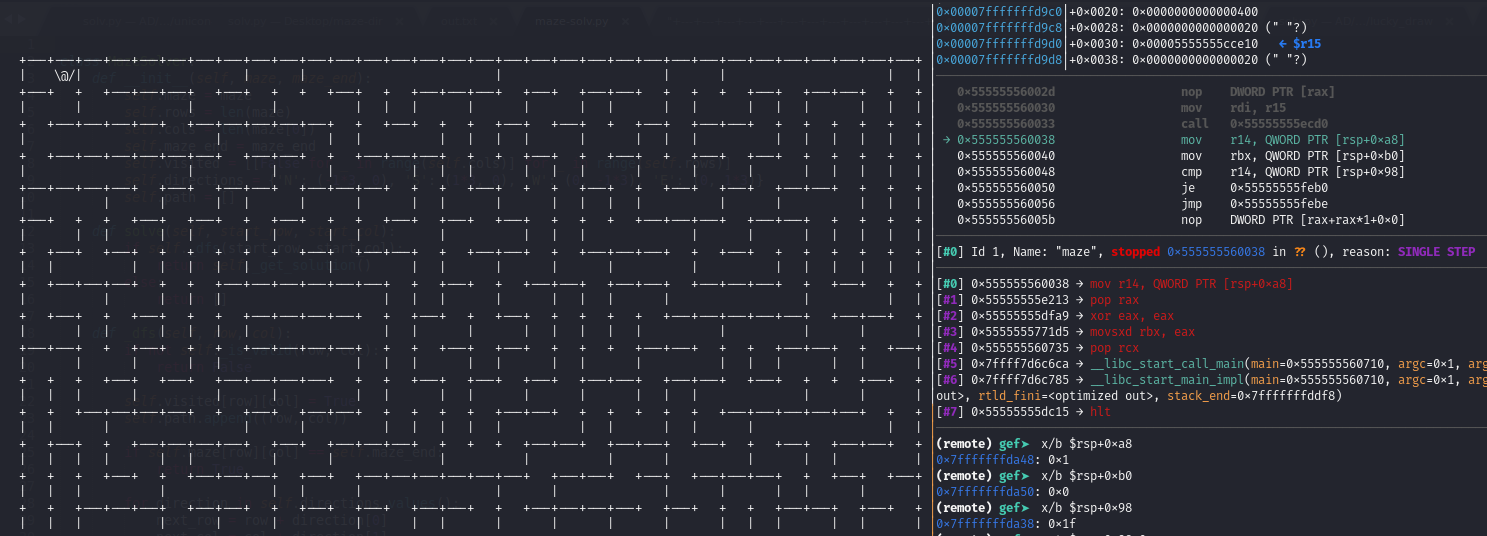
And later r14 is being compared with 0x1f, we can assume that it is the end.
So with these info now we have the memory location of our coordinate, our goal coordinate, let’s automate this.
I created 4 panes to execute respective commands:
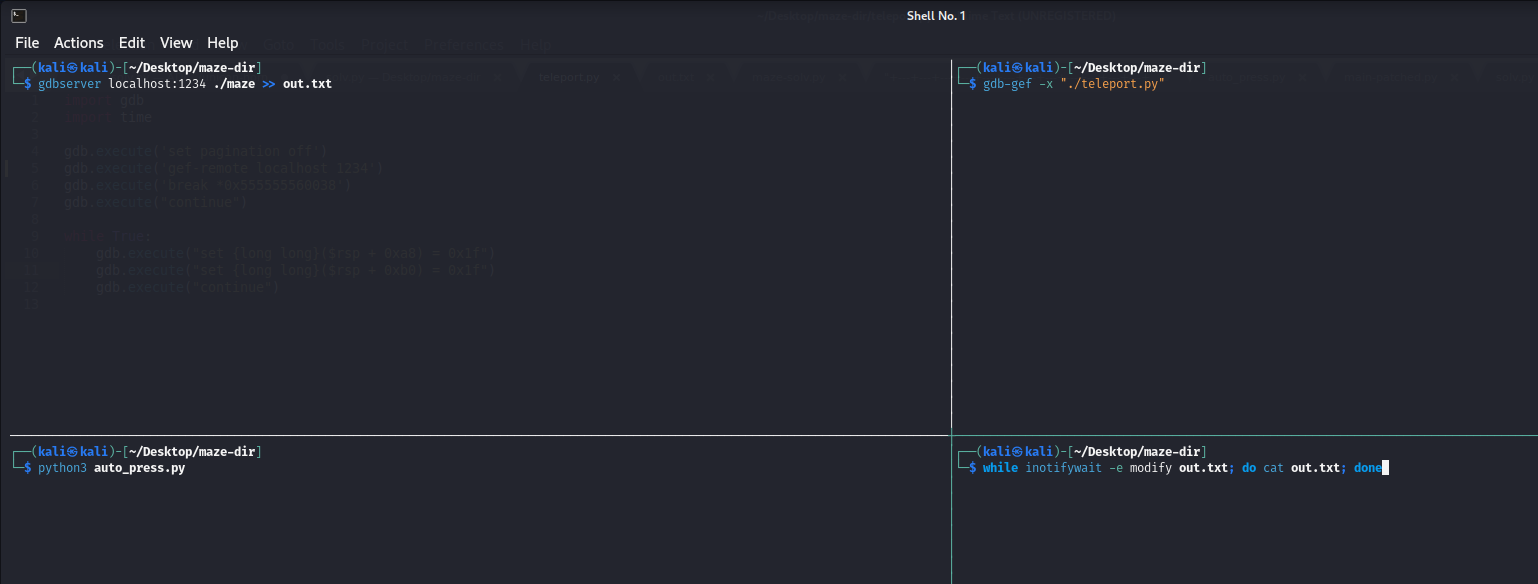
gdbserverpane is to start the gdbserver and append the output (maze) toout.txtteleport.pypane is to automate the teleport:# teleport.py import gdb import time gdb.execute('set pagination off') gdb.execute('gef-remote localhost 1234') gdb.execute('break *0x555555560038') gdb.execute("continue") while True: gdb.execute("set {long long}($rsp + 0xa8) = 0x1f") gdb.execute("set {long long}($rsp + 0xb0) = 0x1f") gdb.execute("continue")auto_press.pypane is to input to trigger the breakpoint set inteleport.py:# auto_press.py import pyautogui import time print("Move your mouse to the Maze") time.sleep(5) pyautogui.click() pyautogui.press("up") i = 0 while True: i += 1 print(f"Round {i}") pyautogui.click() pyautogui.press("up") time.sleep(3)inotifywaitpane is to keep watching theout.txtas we don’t know what will happen until certain levels yet.
And let it run for a while it and we will get the flag at out.txt:
ACS{3e88fc35ac5b6011b6e7e32afd9552666db7bb21d30e83859665ea5e2cae99bc_I7s_funny_M@ze_Gam3!_C0n9r@tu1ation$_On_C13ar!}

Method 3 (Partial dynamic + static analysis)
This method required some decent understanding of the maze itself, the code that responsible to generate flag is at here:
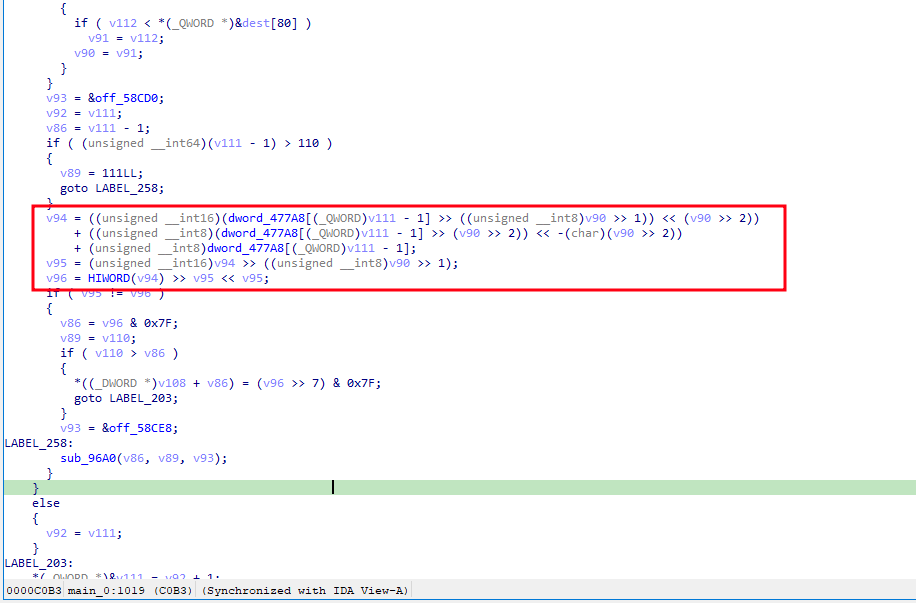
For time being i will not deep dive into this method, but ill leave down the writeup by one of the winning team that used this method:
https://taidh.notion.site/taidh/Write-up-ISITDTU-team-afdb374bfd554458a96c39b840b561bf
Thanks for reading till the end, see you in next CTF!